AI Room Makeover: Generate Before and After Interior Concepts
An AI room makeover works best when the “after” image is planned from the “before,” not detached from it. The point is not to erase the room and replace it with a showroom. The point is to see how the existing space could change: what stays, what moves, what gets upgraded, what becomes more dramatic, and what can be done without losing the room’s identity.
Before-and-after concepts are useful because they make change visible. A homeowner can compare a decor-only refresh against a larger furniture plan before spending a weekend shopping. A creator can show a clear transformation in a post, reel, or listing package. A renter can test a high-impact but reversible version. A family can decide whether the room needs paint, lighting, storage, or simply better styling.
RedesAIgn is built for this kind of iterative room transformation. It includes 10 AI editors, prompts, remix and reference images, saved prompts, and history. You can start with 5 free AI credits and no credit card, then use one-time credit packs if a room needs more rounds. Generated images can be used commercially where relevant, which is helpful for creators, real estate marketers, stagers, and designers, but the final makeover still needs measurement, sourcing, budget review, installation checks, and human judgment.
Decide what kind of makeover you are actually making
A makeover can mean many things. It might be a renter-safe living room refresh with no paint, no drilling, and no new sofa. It might be a bedroom transformation built around new bedding, nightstands, lamps, and a rug. It might be a dramatic dining room concept with darker walls, statement lighting, and stronger art. It might be a content-friendly before-and-after where the change needs to read clearly in one image.
Start by naming the scope. A decor makeover changes rugs, curtains, lamps, pillows, art, plants, bedding, and accessories. A furniture makeover changes chairs, tables, sofas, storage, bed frames, dining sets, or desks. A surface makeover changes paint, flooring, tile, cabinetry color, counters, or hardware. A renovation makeover can include built-ins, walls, openings, fixtures, or construction ideas. Mixing all four scopes in one prompt often creates an exciting image that is hard to act on.
The better first question is: what would make the room feel different while still respecting the constraints? If the sofa must stay, say so. If the flooring is expensive to replace, keep it. If the room is rented, make reversibility part of the brief. If the makeover is for content, decide whether the image should be dramatic, believable, budget-friendly, or a staged “concept reveal.”
For related planning, AI home decor generator is useful when styling layers are the main change. If the room needs a broader layout study, compare with AI room design generator or AI interior design from photo. For an empty space that needs furniture from scratch, AI empty room design may be a better first step.
Build the before photo around honest transformation
The before photo sets the rules. If it hides the awkward corner, the generated after will not solve the awkward corner. If it crops out the old flooring, the after cannot respond to it. If it removes everyday items that shape the room, the concept may look polished but fail in real life. A useful before photo gives the AI enough context to understand scale, fixed features, and the design problem.
Shoot from a corner, doorway, or far wall with the camera level. Include the floor, ceiling line, windows, doors, main furniture, and the surfaces you want to change. Open curtains if daylight helps, but avoid filters that alter wall, floor, or fabric color. If the room is dim, turn on lamps so the layout is readable.
Do a quick reset without staging a fake life. Remove trash, dishes, laundry, and temporary clutter. Keep the sofa that must stay, the toy storage that needs a better solution, the desk that shares the bedroom, the pet bed, the radiator, the ceiling fan, or the blinds that are part of the room’s reality. The more honest the input, the more useful the transformation plan.
For content, take a clean before photo from the angle you want to repeat later. Consistent framing matters in a side-by-side comparison. Mark the camera spot with tape if you plan to photograph the real after.
Prompt the after image with a transformation brief
A good makeover prompt describes the before-to-after change. Instead of asking for “a beautiful living room,” tell the tool what needs to be transformed and what must remain recognizable. This keeps the after image connected to the real room.
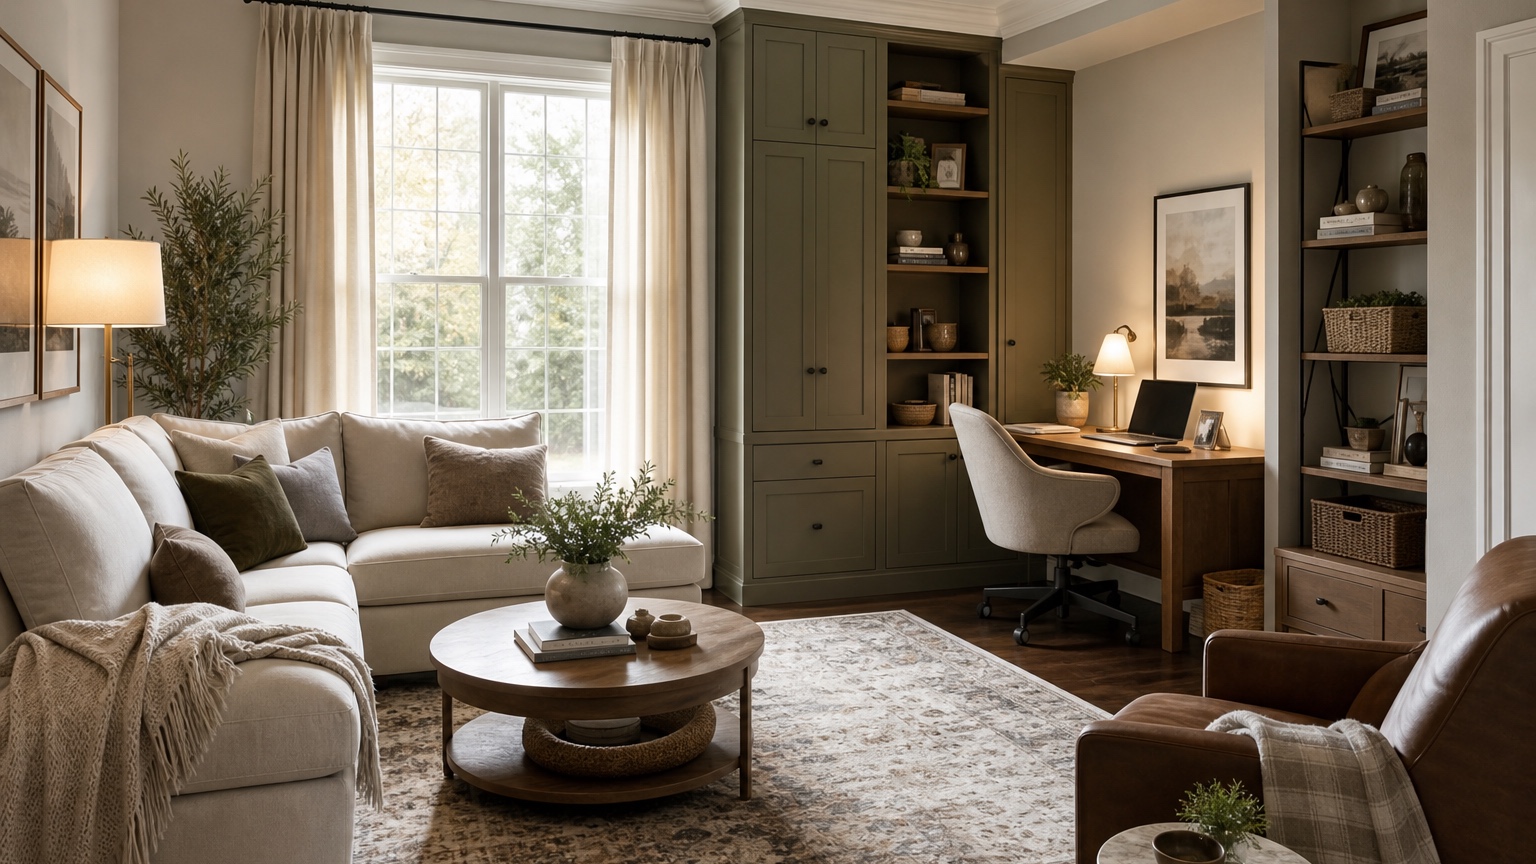
For a practical living room refresh, try: “Create a realistic before-and-after room makeover from this photo. Keep the windows, floor, ceiling, sofa, media wall, and room proportions. Improve rug size, coffee table, lamps, curtains, pillows, art, plants, storage baskets, and warm color palette. Make the room feel finished but achievable without renovation.”
For a bedroom reveal, try: “Transform this bedroom into a calm, grown-up after concept. Preserve the bed location, windows, closet doors, floor, ceiling, and dresser. Upgrade bedding, nightstands, lamps, rug, curtains, wall art, and accent colors. Keep circulation believable and avoid changing architecture.”
For a dramatic creator concept, try: “Generate a bold before-and-after makeover for this room while keeping the architecture and room size intact. Use deeper color, stronger lighting, larger art, layered textiles, and a clearer focal wall. Make the transformation visually obvious for a comparison post, but do not remove windows, doors, or fixed features.”
Reference images can guide the after without taking over the room. Use one for color palette, one for material mood, or one for styling density. Then write: “Borrow the warmth and materials from the reference, but preserve the uploaded room layout and fixed features.” RedesAIgn’s reference images and remix workflow are helpful when you want several after concepts that share the same source photo but explore different moods.

Stage dramatic versus practical makeovers
Dramatic after images get attention, but practical after images get completed. You do not have to choose one immediately. Generate both, then decide which role each version plays. The dramatic version can clarify taste, content direction, or long-term ambition. The practical version can guide the next shopping list.
A dramatic makeover may use deeper wall color, larger art, stronger contrast, statement lighting, patterned rugs, richer textiles, or more sculptural furniture. It should still respect the room’s architecture. If the result removes a door, invents a huge window, or adds a fireplace that does not exist, it may be visually strong but not a useful after plan.
A practical makeover works within constraints. It might keep flooring and sofa while changing rug, curtains, lamps, pillows, art, side tables, and storage. It might leave cabinets intact but shift the wall color, hardware, runner, and lighting warmth. It might keep a small bedroom’s layout but improve bedding, scale, bedside lighting, and curtains.
Use remix rounds to move between the two. If the dramatic version has the right mood but unrealistic construction, remix with “keep the same mood, but make it decor-only and budget-conscious.” If the practical version feels too quiet, remix with “increase contrast through textiles, art, lighting, and one bold accent color without renovation.” This gives you a spectrum rather than a single all-or-nothing concept.
Plan makeovers by budget tier
Budget tiers keep a makeover honest. A $300 refresh, a $1,500 update, and a renovation concept should not look like the same project. Asking for tiers helps you see which changes create the biggest visual return and which ones are only nice to have.
For a low-budget tier, focus on rearranging furniture, removing visual clutter, improving lamps, changing pillow covers, adding a throw, styling shelves, using a larger secondhand rug, adding removable art, and choosing plants or baskets. In bedrooms, bedding and lamps often make the largest visible difference. In living rooms, rug scale and lighting usually matter more than small accessories.
For a mid-range tier, test new rug, curtains, coffee table, accent chairs, storage cabinet, dining chairs, bed frame, nightstands, or a few larger art pieces. This is where AI can prevent mismatched purchases. If the generated room shows that a dark coffee table makes the room heavy, try a lighter wood before buying. If a patterned rug fights the curtains, test a calmer version.
For a renovation tier, separate inspiration from commitment. Paint, flooring, tile, built-ins, hardwired lighting, counters, cabinetry, or wall changes need samples, quotes, and professional review. Use the image to compare direction, then validate with specialists. If flooring is central, move into AI flooring visualizer. If paint drives the change, use AI wall color visualizer interior to isolate wall decisions.
Preserve the room’s identity
The most convincing makeover usually keeps something familiar. That might be the view, the sofa shape, the old wood floor, the original trim, the fireplace, the arched doorway, a favorite chair, inherited art, or the way the morning light crosses the room. If the after image removes every recognizable feature, the transformation may feel disconnected.
Preserving identity does not mean keeping the room dull. A dated living room can keep its wood floors and fireplace while gaining a calmer palette, better lighting, larger rug, and updated art. A small bedroom can keep its layout while looking more intentional through bedding, curtain height, lamp scale, and wall color. A rental kitchen can keep cabinets and tile while changing runner, counter styling, lighting warmth, and color accents.
Name those identity anchors in the prompt. “Keep the original fireplace as the focal point.” “Preserve the warm oak floor and make the palette work with it.” “Keep the vintage dresser and design around it.” “Keep the view and avoid blocking the window.” These instructions help the AI produce an after that feels like the same home improved.
This is especially important when collaborating with another person. A spouse may not object to change; they may object to losing what made the room feel like theirs. A client may want freshness without erasing a brand, neighborhood, or property character. A creator may want a reveal that still feels believable to followers who know the before.
Make before-and-after comparisons content-friendly
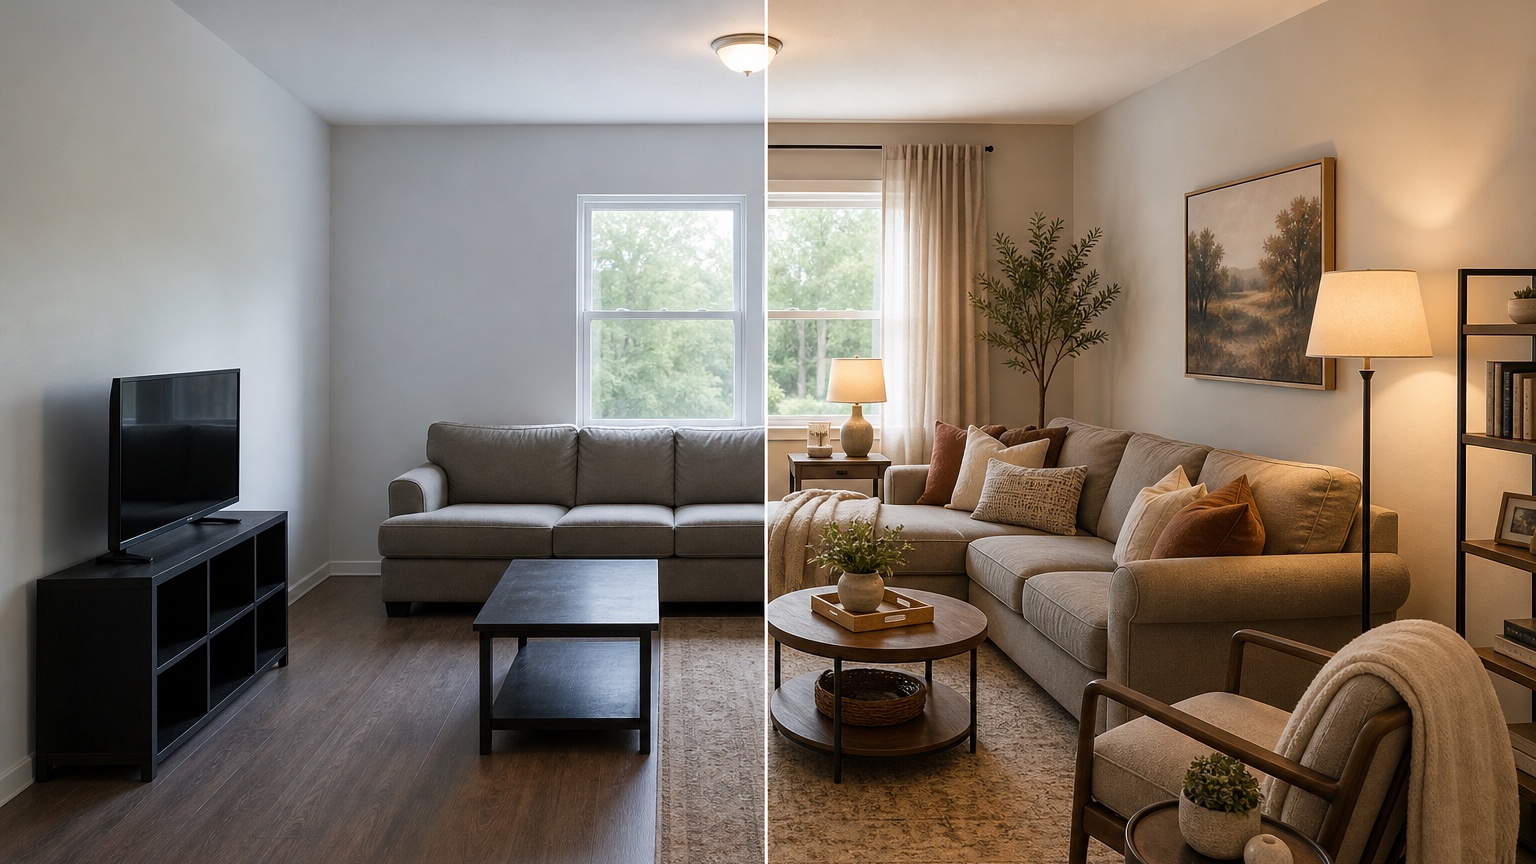
If the makeover will be shared online, plan the comparison from the beginning. Before-and-after images need clear contrast, but they also need trust. A transformation that changes the room’s dimensions, window placement, or ceiling height can look misleading. Keep the same camera angle when possible, and ask the AI to preserve the room shell so the change reads as design rather than trickery.
For creators, generate variations that support different storylines. One version might be “renter-safe makeover under a modest budget.” Another might be “same room, three color moods.” Another might be “from cluttered spare room to guest-office.” Save prompts for each storyline so captions, scripts, and shopping notes are easier to write later.
When comparing images, label the type of change. “Decor-only,” “mid-range furniture update,” “paint and lighting concept,” and “dream renovation” are clearer than “Option 1” and “Option 2.” Viewers understand the rules, and you avoid presenting a fantasy concept as if it were a weekend project.
If the final image supports a listing, client pitch, sponsored post, or design service, keep disclosures and practical limits in mind. RedesAIgn-generated images can be used commercially where relevant, but any real installation, advertised claim, or product recommendation should be checked against actual measurements, availability, materials, and local requirements.
Turn the chosen after into an action plan
Once you choose a direction, translate the image into tasks. List what stays, what moves, what gets bought, what gets sampled, what needs a quote, and what needs measurement. A beautiful after image is not the finish line; it is the visual brief.
Start with the highest-impact changes. In many rooms, that means rug size, lighting, curtains, wall color, storage, and one or two larger focal pieces. Avoid spending the budget on scattered small decor before the room has scale and function. If the image depends on full-length curtains, measure rod height and width first. If it depends on a large rug, tape the footprint on the floor. If it depends on paint, sample in the room at different times of day.
Use RedesAIgn history to keep the winning prompt. If you later need a closer variant, you can remix from the version that already preserved the room well. If you are using the makeover with a client, save the before, selected after, prompt, and notes together so the reasoning is easy to explain.
A good AI room makeover should leave you with fewer unknowns: the main style direction, the changes worth testing, the items to measure, the budget tier that feels realistic, and the parts of the room that should remain recognizable. That is how the before-and-after image becomes a plan instead of a distraction.
FAQ: AI room makeover
What is an AI room makeover?
An AI room makeover uses a room photo and prompt to create before-and-after interior concepts. It can test layout, decor, color, lighting, furniture, surfaces, and styling while preserving the original room when prompted carefully.
How do I make the after image realistic?
Use a clear before photo, name the fixed features, set a budget or scope, and ask the tool to preserve room proportions, windows, doors, floors, ceiling, and any furniture that must stay.
Can I create dramatic and practical versions?
Yes. Generate a bold concept for inspiration or content, then remix it into a decor-only, mid-range, or budget-conscious version that can guide real purchases.
Can I use AI room makeover images for content or clients?
RedesAIgn-generated images can be used commercially where relevant. For client work, listings, sponsored content, or real installations, verify measurements, products, materials, permissions, and professional requirements.